
Kaise Use Karein — Health & Relief
Yeh document government-style user guide hai. Har step ke saath website / app screenshot (Figure) diya gaya hai, taaki Patient / Doctor / Lab / Pharma users aur backend / support team ko process clear rahe.
| Document Title | Health & Relief — How to Use (Screenshot Guide) |
|---|---|
| Document Code | HNR-USER-GUIDE-001 |
| Audience | Patient, Doctor, Lab Partner, Pharma Partner, Support / Backend Team |
| Channels | Website · Patient App · Doctor App · Professional App · WhatsApp |
| Language | Hinglish (easy for all users) |
| Website Page | /how-to-use · Doctor: /how-to-use/doctor |
Doctor ke liye — HNR Doctor App complete guide
Login, clinic setup, slots, video consultation, daily appointments aur prescription — phone-screen figures ke saath, simple Hinglish mein (pure English nahi).
Poora Doctor App manual alag page pe hai
Attractive modern layout + har step ke saath phone mock screenshot. Print / PDF bhi usi page se ban sakta hai.
- 5-step go-live checklist (visibility, clinic, slots, video)
- 2 approvals clearly explained (Doctor + Clinic)
- Daily Schedule, video call, AI / manual prescription
- Revenue, leaves, associates short tips + troubleshooting
https://healthnrelief.com/how-to-use/doctor
Patient ke liye — Registration se My Health tak
Neeche har step ke saath actual website screen diya gaya hai. Pehle figure dekho, phir checklist follow karo.
Website open karo / Home page
Browser mein Health & Relief website open karo. Yahan se Find Doctors, Sign Up, WhatsApp ya AI Assistant start ho sakta hai.
Home → Find Doctors / Sign Up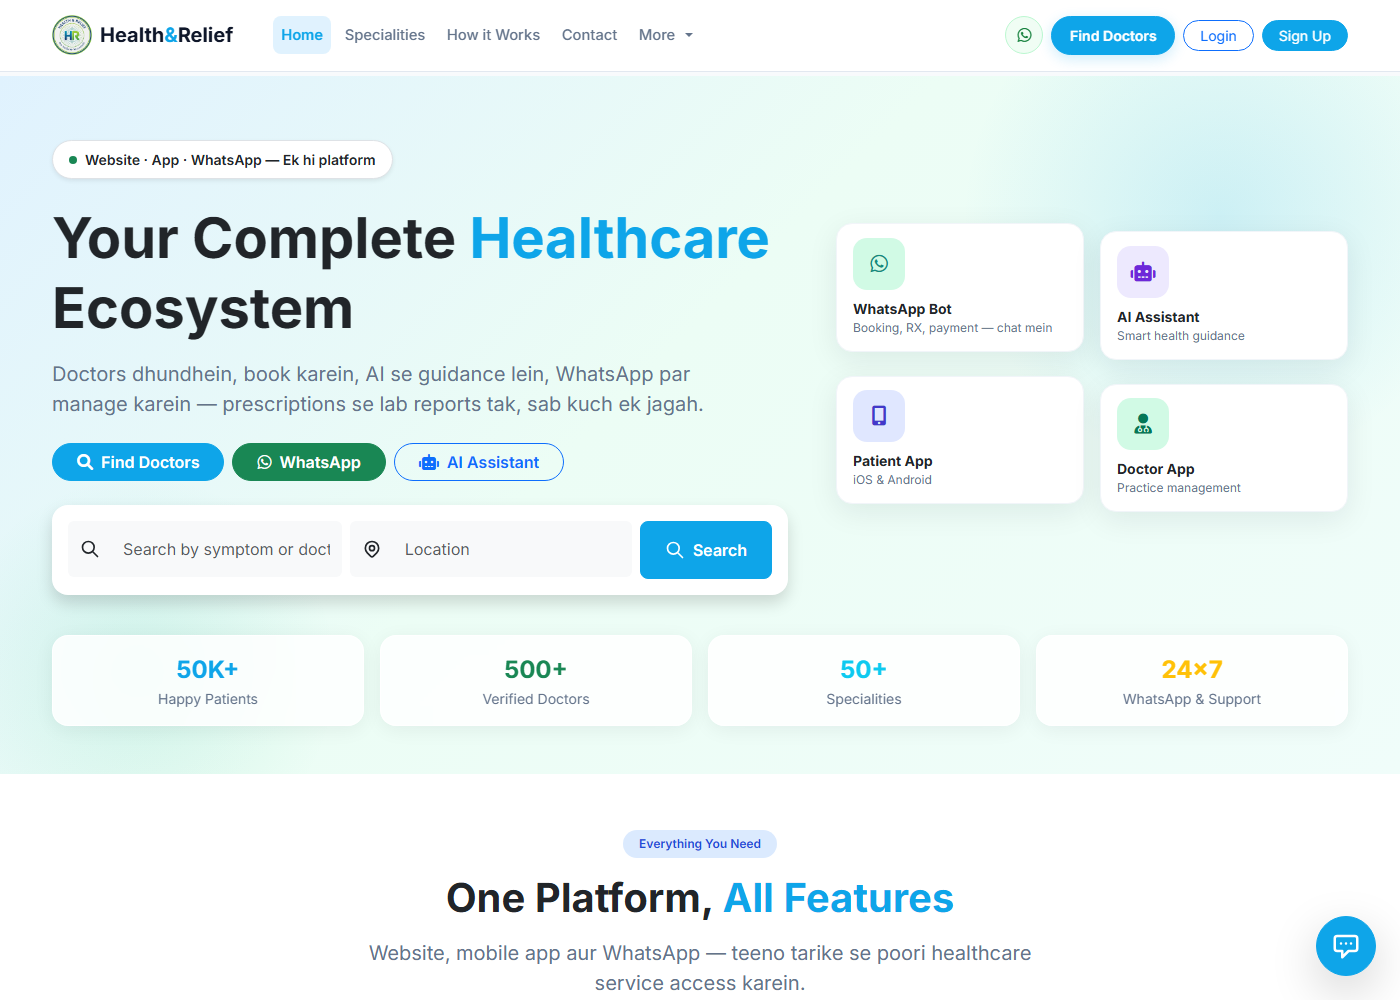
Screen par search bar, Find Doctors button, Login / Sign Up clearly dikhte hain.
Patient account banao (Registration)
Naya patient ho to Sign Up / Patient Registration open karo.
- Full Name bharo
- Mobile Number ke paas Verify dabao → OTP enter karo
- (Optional) Email verify kar sakte ho
- Password set karke Create Account dabao
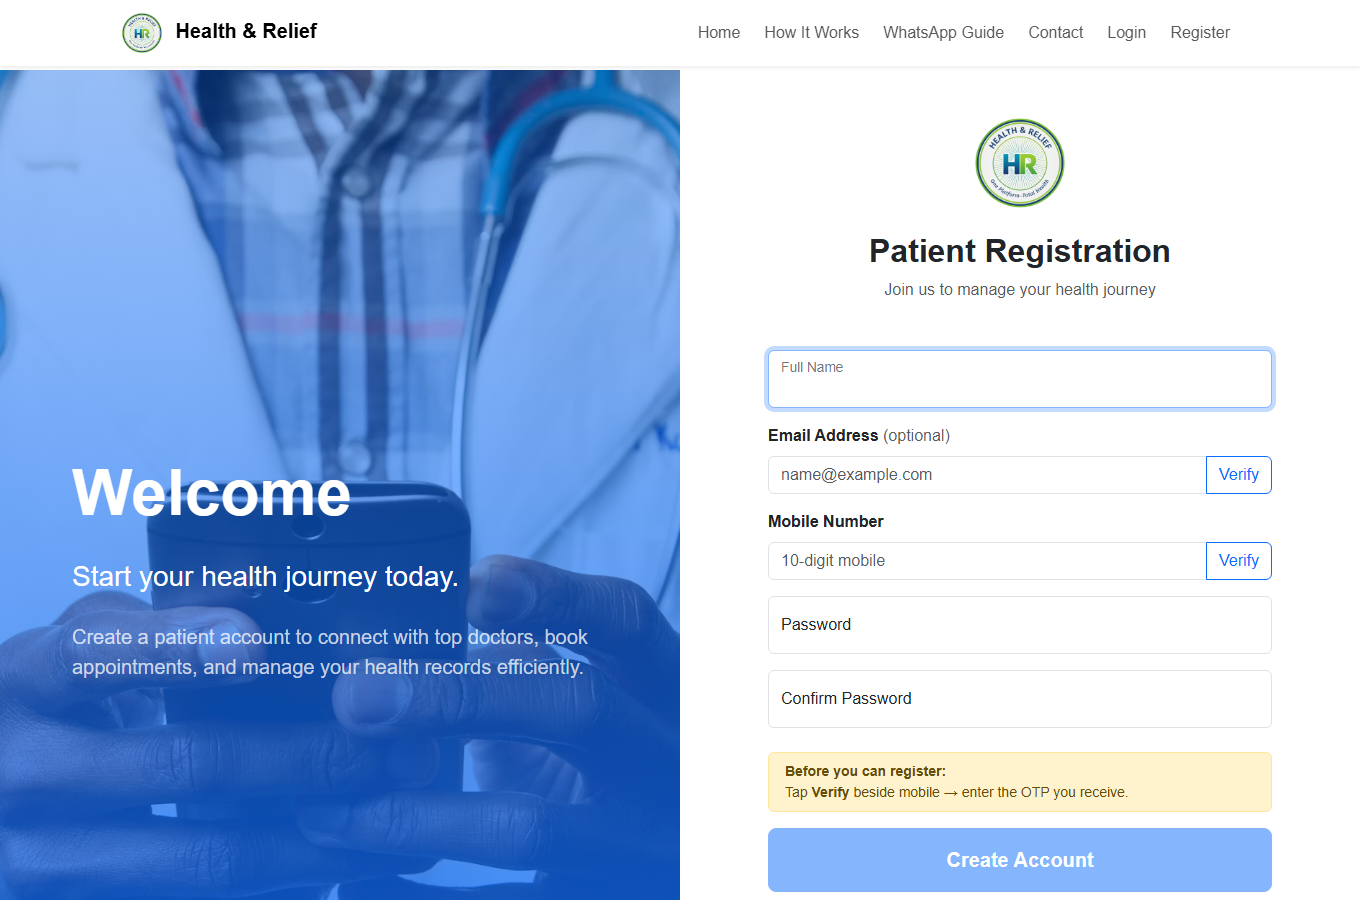
Yellow note: pehle mobile Verify (OTP) zaroori hai, tabhi account create hoga.
Login karo
Already account hai to Login screen se Mobile + Password se Sign In karo.
/login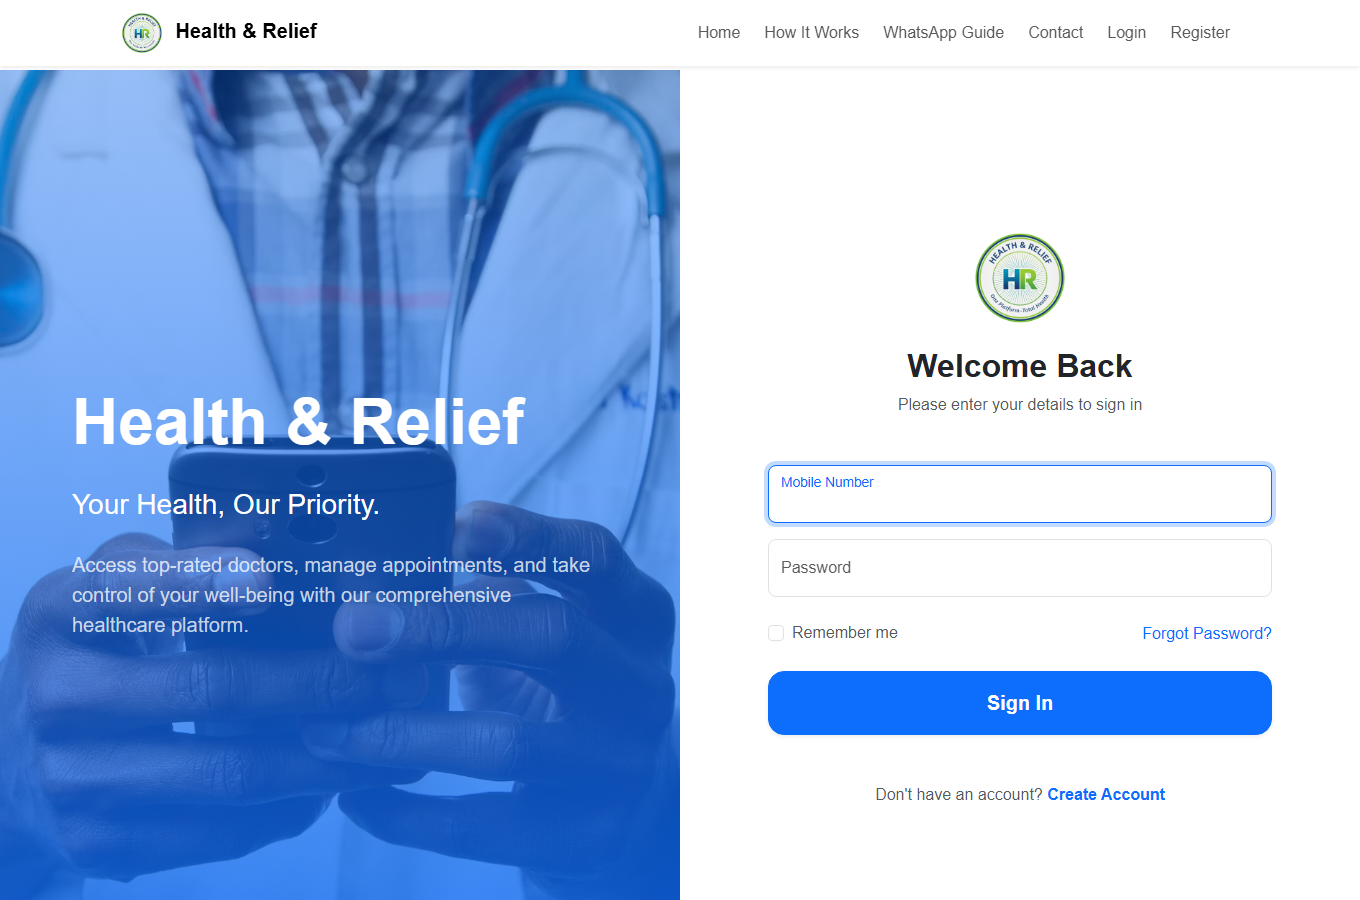
Forgot Password link se mobile OTP se password reset ho sakta hai.
Specialty se doctor category choose karo
Agar clear nahi ki kis doctor ke paas jana hai, Specialities page se symptom / specialty browse karo.
Menu → Specialities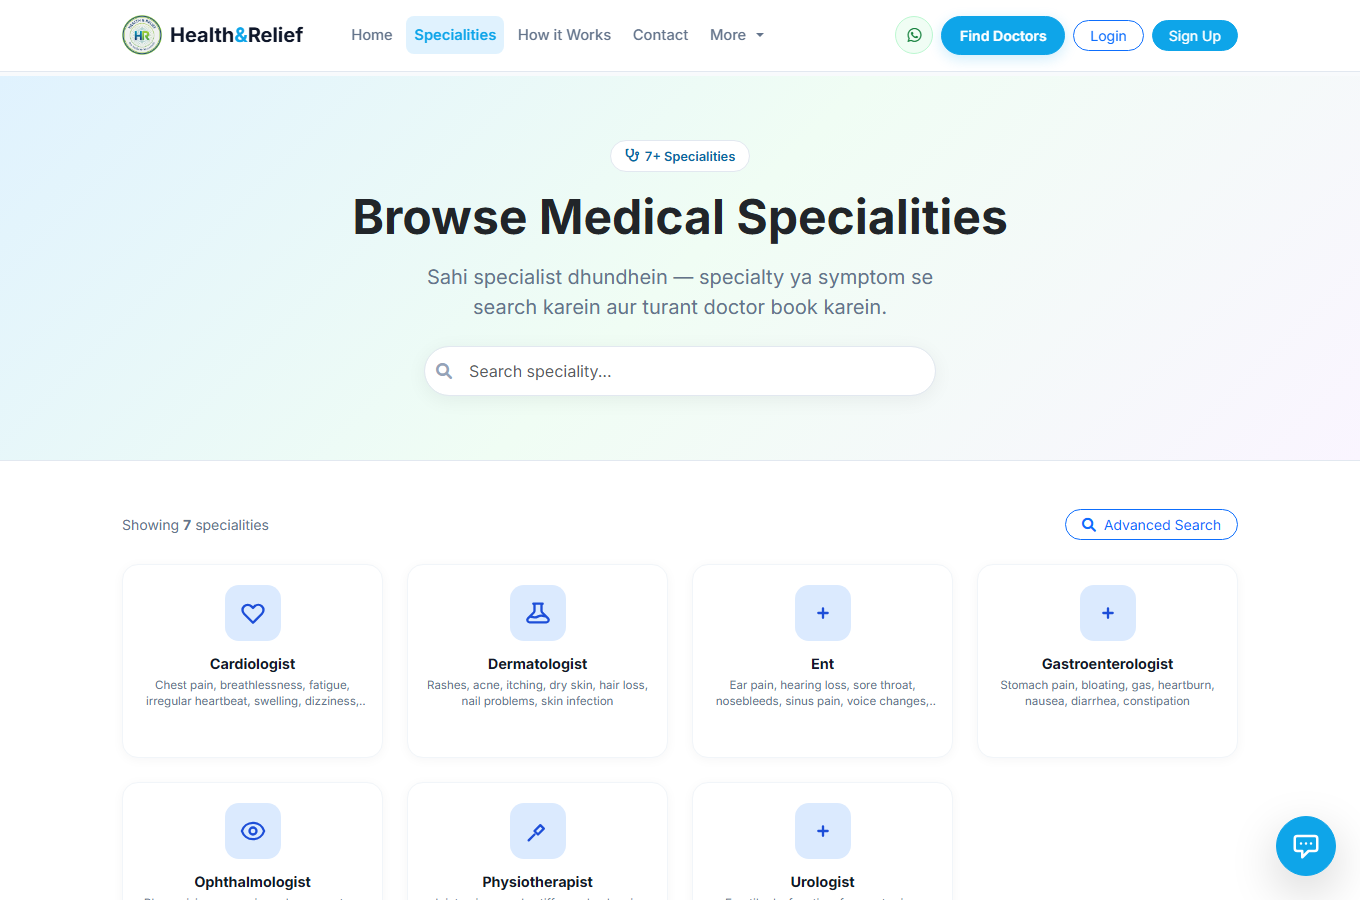
Har card pe specialty + common symptoms dikhte hain — Cardiologist, Dermatologist, ENT, etc.
Doctor search / list dekho
Find Doctors page par name, symptom, specialty ya city se search karo. Filters: Video / Today / Tomorrow use kar sakte ho.
- Doctor card pe experience, city, fee, Video tag dekho
- Book button se aage badho
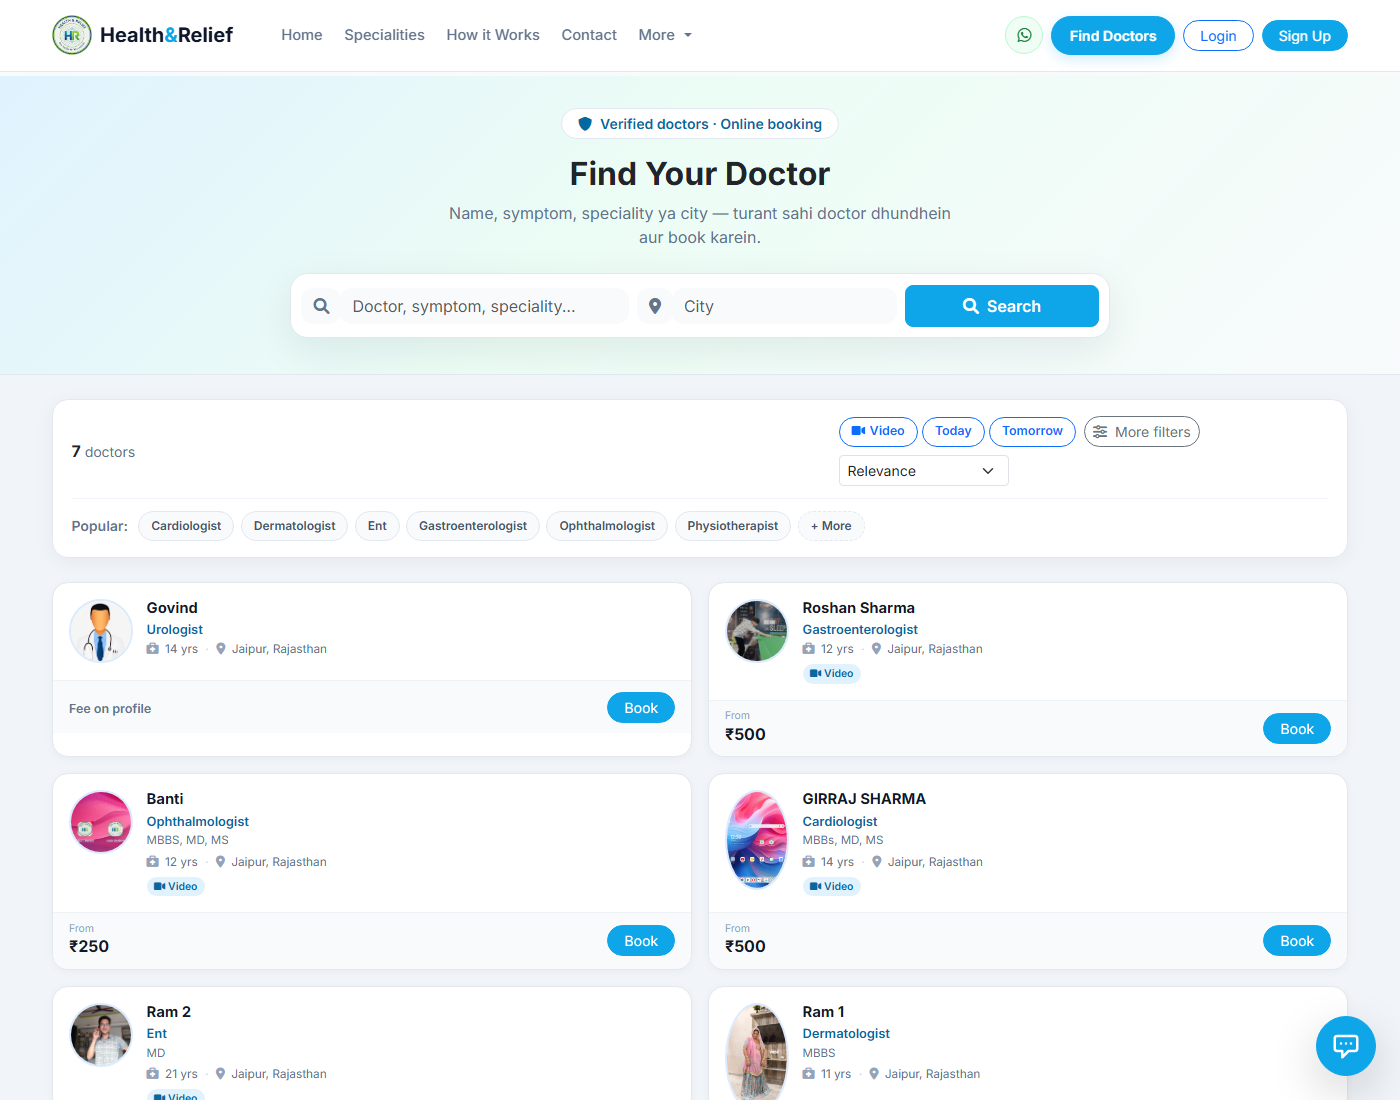
Backend note: yahi listing API / web search se aati hai. Book click ke baad slot + payment flow start hota hai.
Slot choose → Pay → Confirm
Clinic visit ya Video Consult select karo, available date-time choose karo, Cashfree se payment complete karo.
- Payment success ke baad booking code milta hai
- SMS / app / WhatsApp par confirmation aati hai
- Video booking ho to call se pehle notification aayegi
My Health — RX / Lab reports / Bills
Visit / video consult ke baad Patient Dashboard → My Health mein prescriptions, lab reports aur bills milte hain.
Patient Dashboard → My Health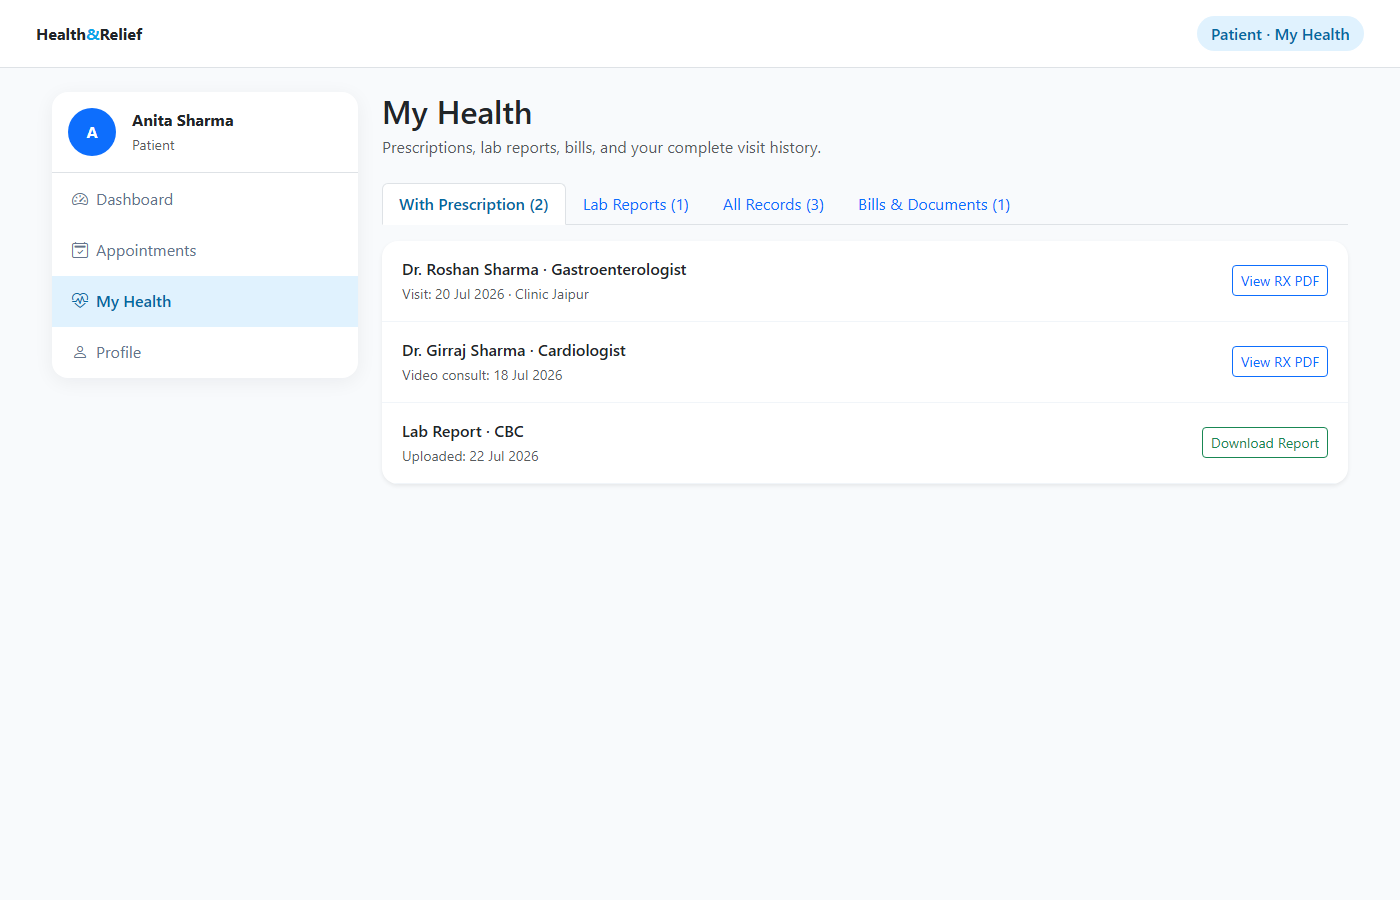
Tabs: With Prescription · Lab Reports · All Records · Bills & Documents.
WhatsApp se bhi booking (optional)
App / website ke bina WhatsApp par menu ya hnr likho → Doctor Booking choose karo.
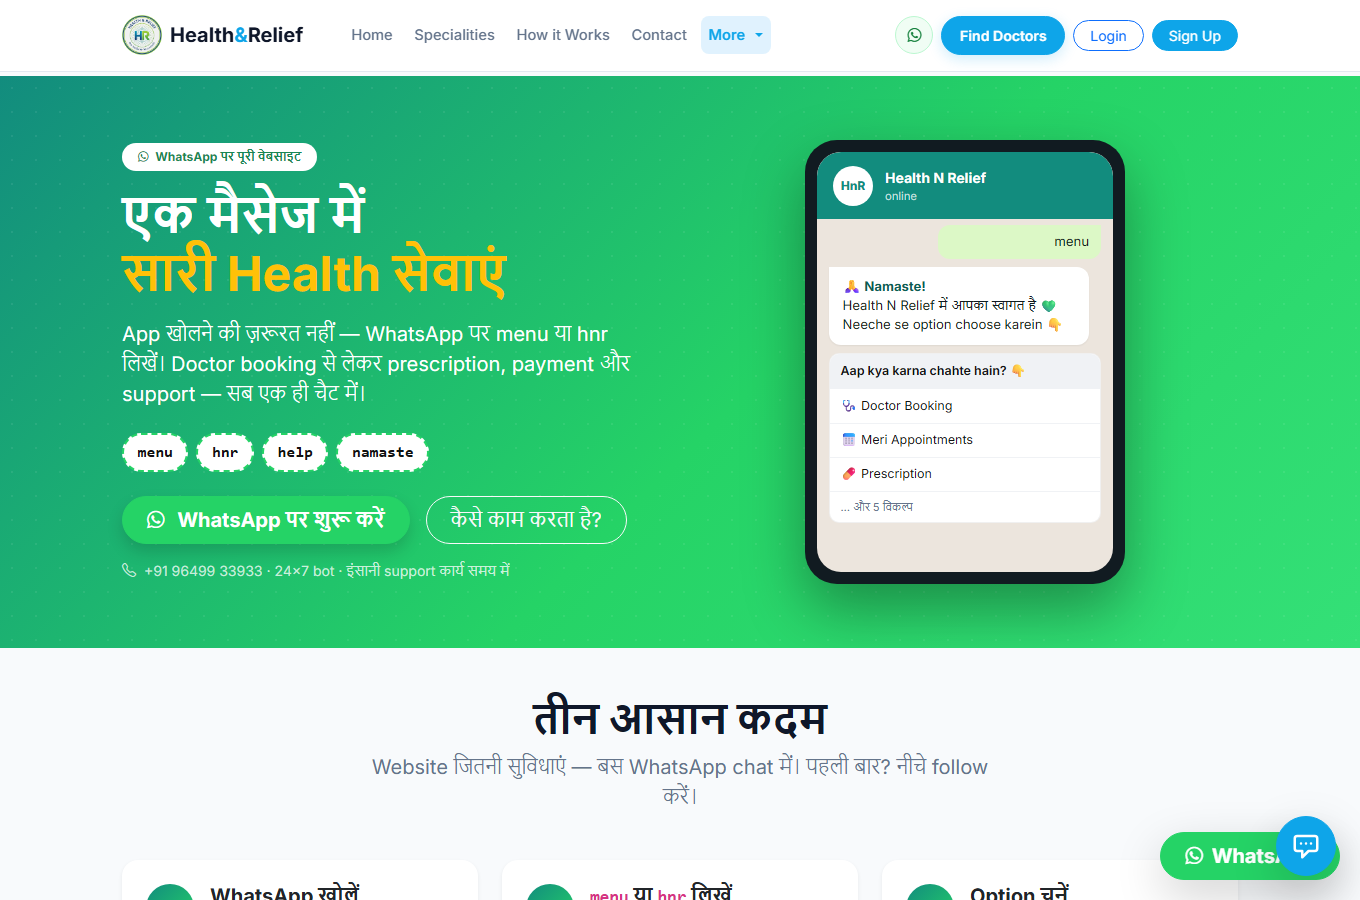
Poora Hindi/Hinglish WhatsApp flow is page pe explain hai.
Lab ke liye — Register se Report Upload tak
Lab partner registration ke baad dashboard par doctor ke prescribed tests aate hain. Order flow screenshots ke saath neeche hai.
Lab Registration
- Register as Lab page open karo
- Authorized person name, mobile Verify (OTP), password set karo
- Register as Lab dabao
- Baad mein business documents / profile complete karke verification wait karo
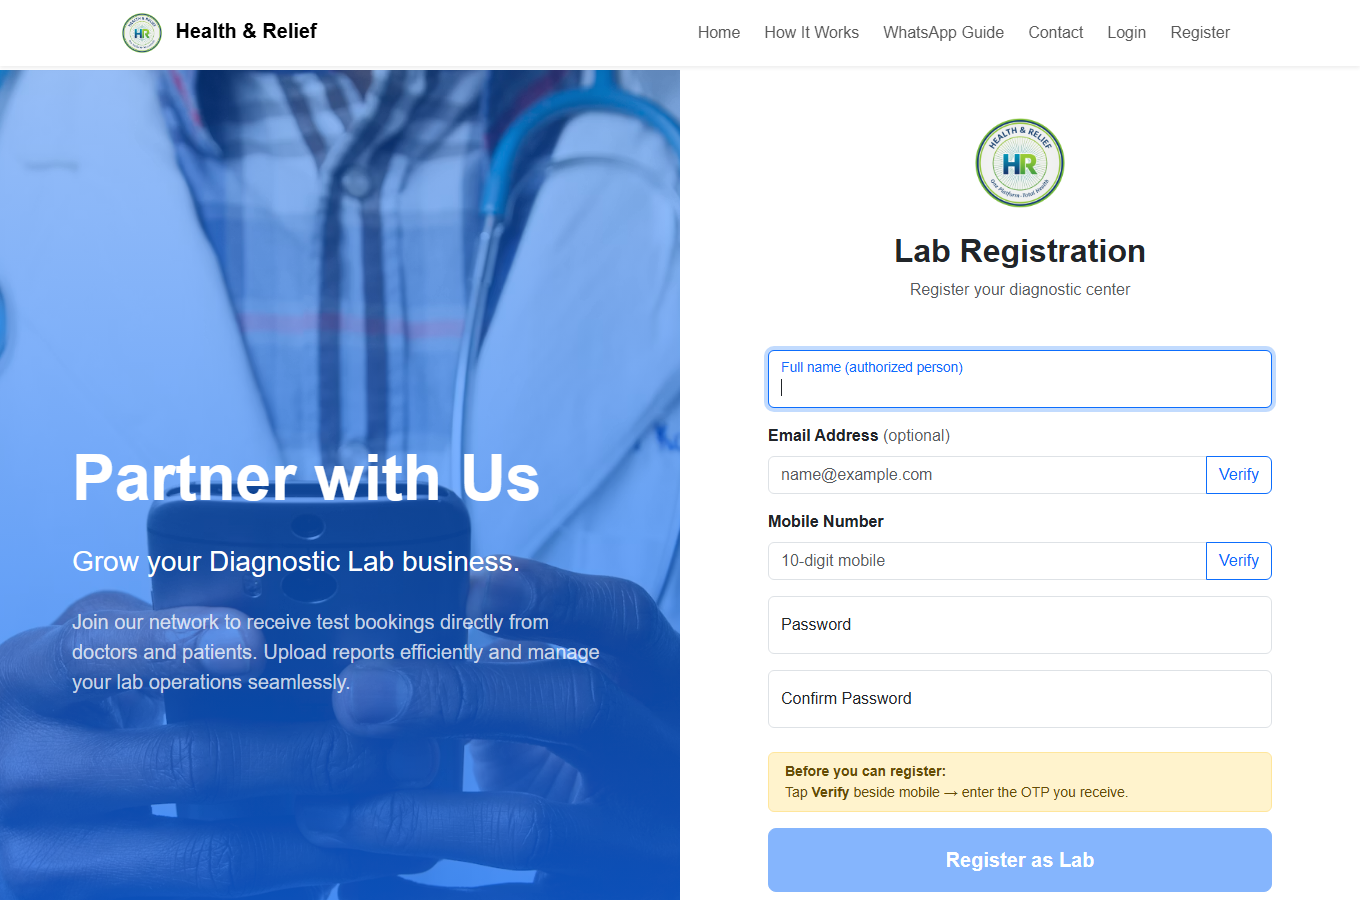
Verification complete hone ke baad hi live orders unlock hote hain.
Login → Lab Dashboard
Login ke baad Lab Portal open hota hai. Left sidebar: Dashboard, Orders, Find Doctors, Business Profile.
Login → Lab Dashboard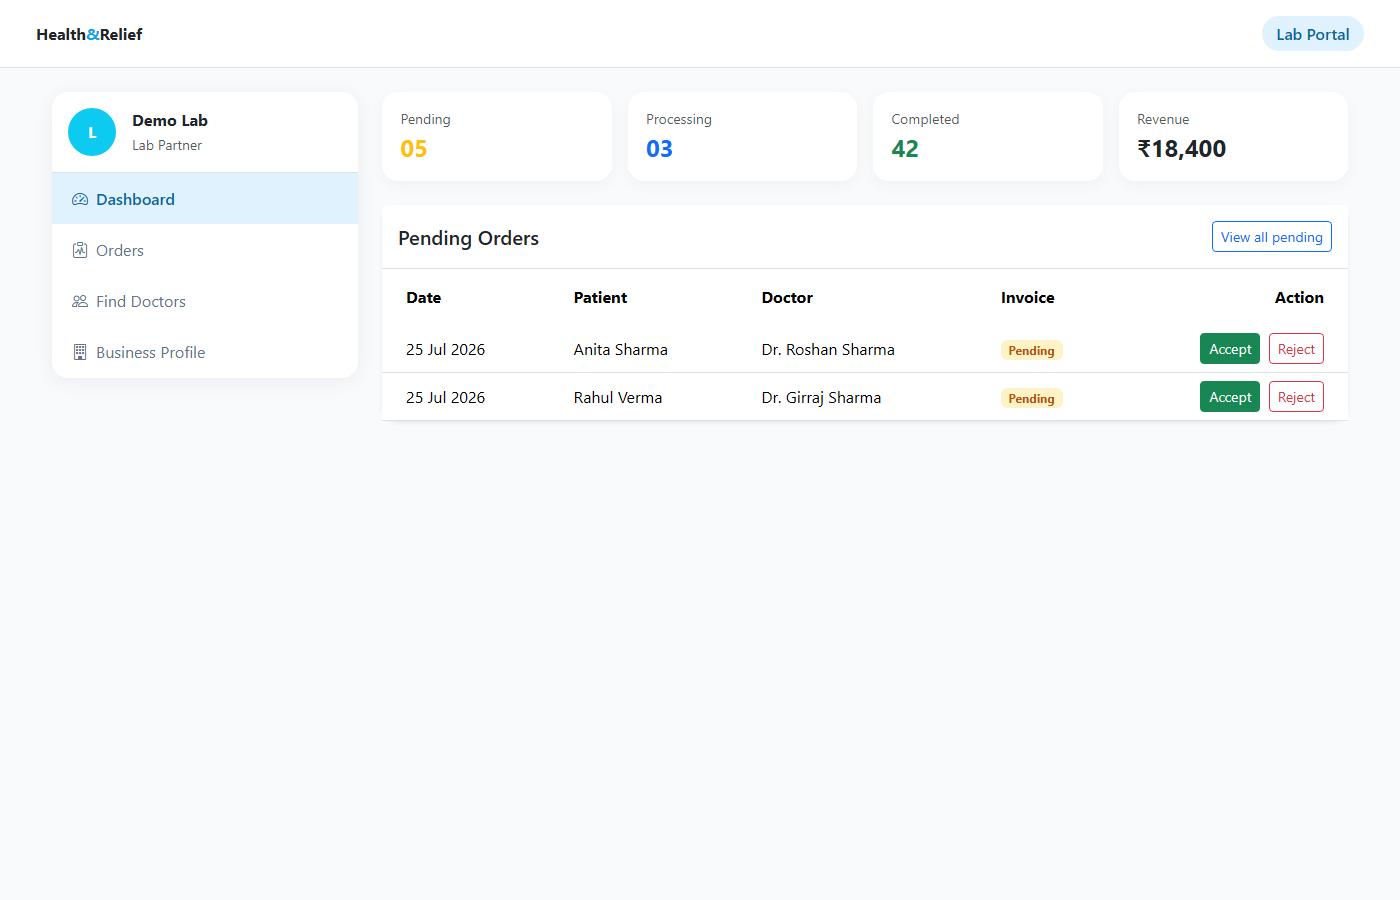
Pending orders table mein Accept / Reject buttons dikhte hain. Stats: Pending, Processing, Completed, Revenue.
Orders process — Accept → Sample → Report
Sidebar se Orders open karo. Status chips se filter karo.
- Pending: Accept ya Reject
- Accepted: Book / schedule
- Sample Collect: sample status update
- Upload Report: final report upload → Completed
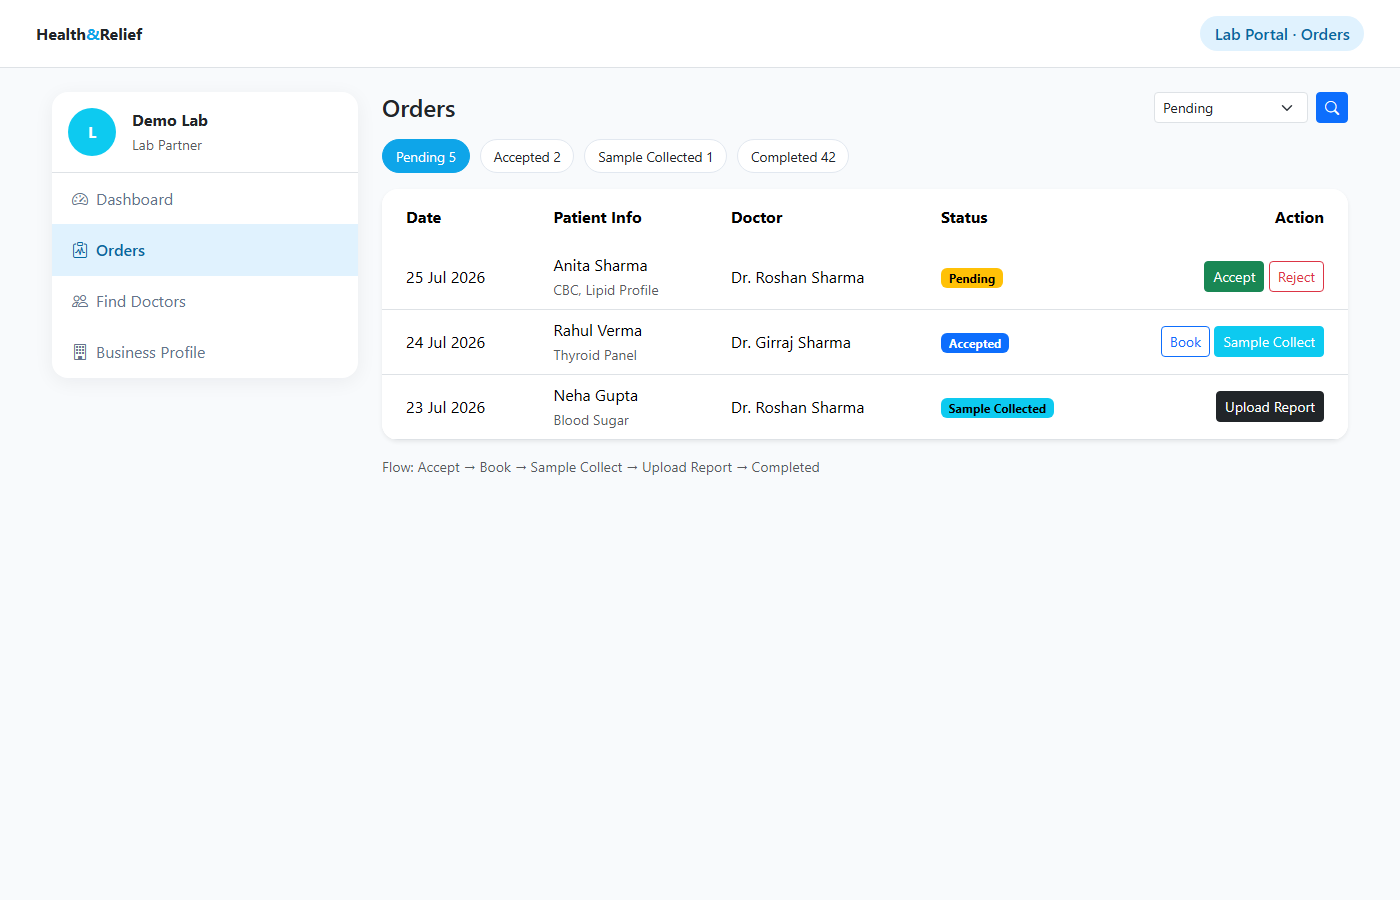
Official flow line: Accept → Book → Sample Collect → Upload Report → Completed.
Doctors se connect (Associate)
Sidebar → Find Doctors se associate request bhejo, ya doctor invite accept karo. Connection ke baad hi regular orders aate hain.
Pharma ke liye — Register se Bill Upload tak
Pharmacy registration ke baad doctor ke medicine prescriptions orders ke roop mein aate hain.
Pharma Registration
- Register as Pharma page open karo
- Name, mobile OTP Verify, password set karo
- Register as Pharma dabao
- Business profile / documents complete karke verification complete karo
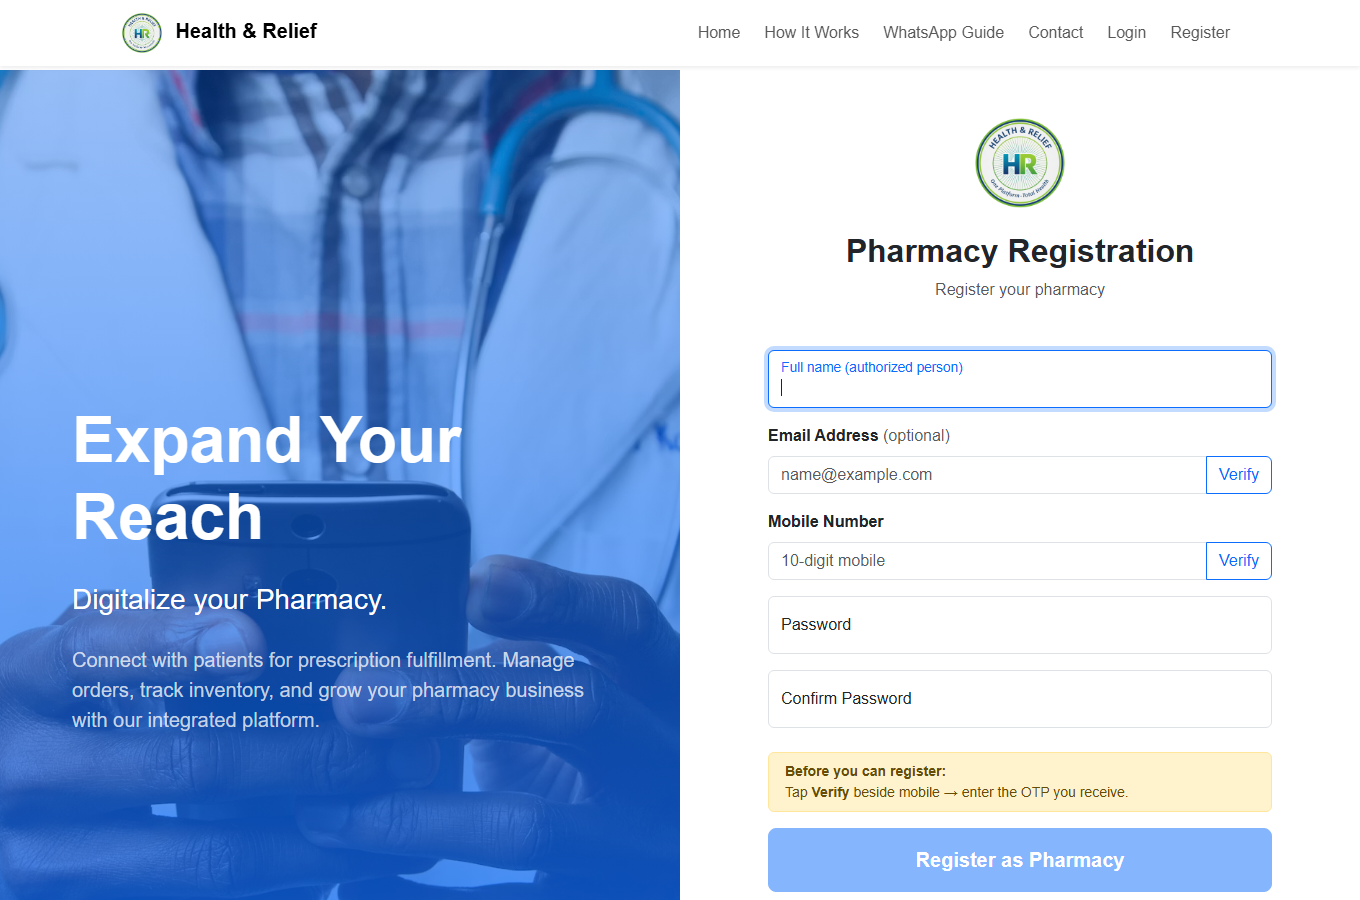
Verification ke baad pharmacy dashboard unlock hota hai.
Login → Pharma Dashboard
Sidebar: Dashboard, Orders, Find Doctors, Business Profile. Pending medicine orders yahan dikhte hain.
Login → Pharma Dashboard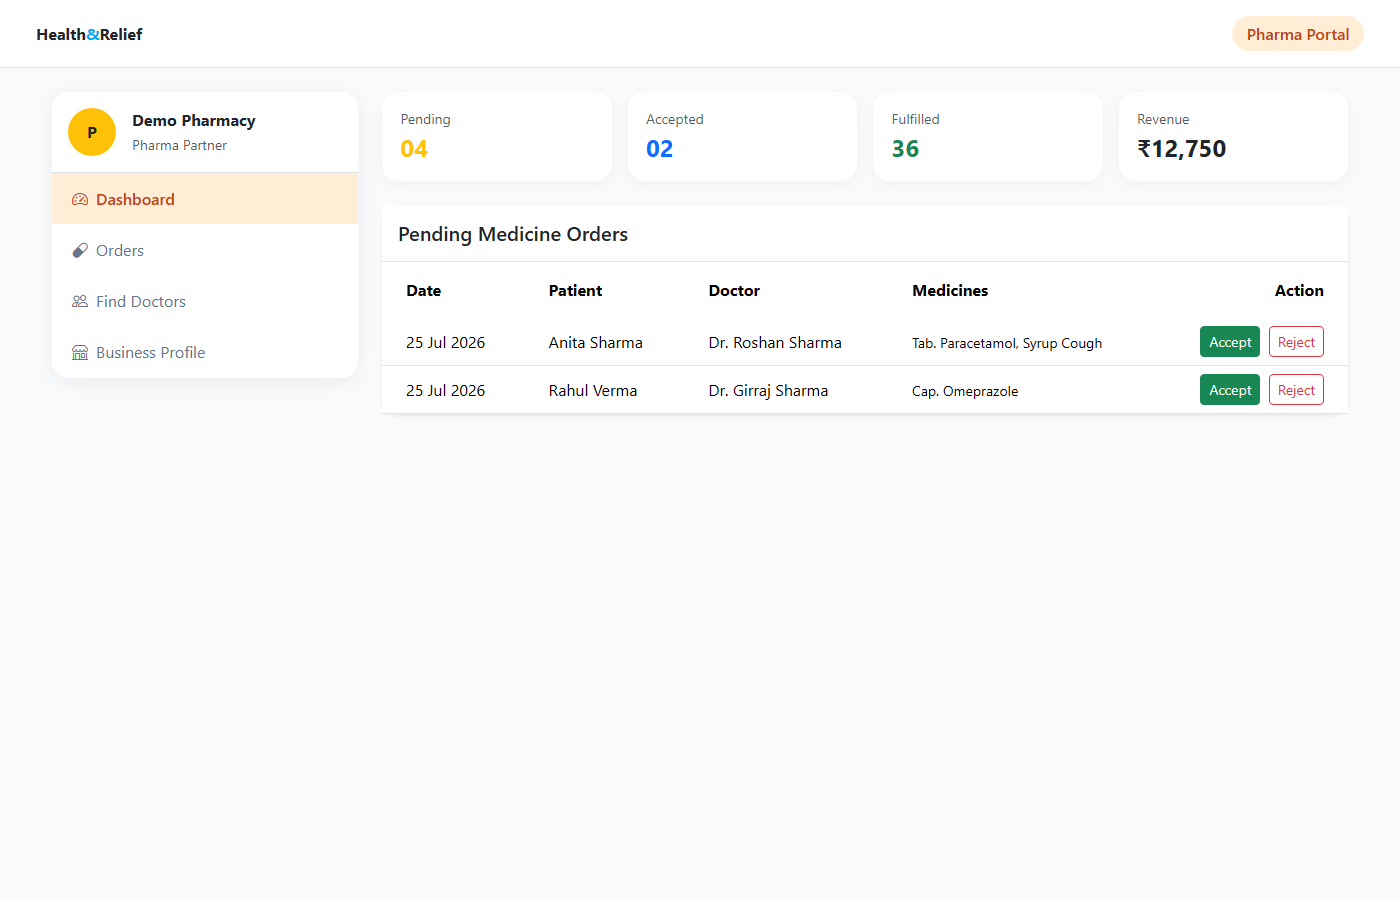
Har row mein patient, doctor, medicines list + Accept / Reject actions.
Orders fulfill + Bill upload
- Pending: stock check karke Accept / Reject
- Accepted: medicines prepare karo
- Fulfill: order complete mark karo
- Upload Bill: invoice attach karo
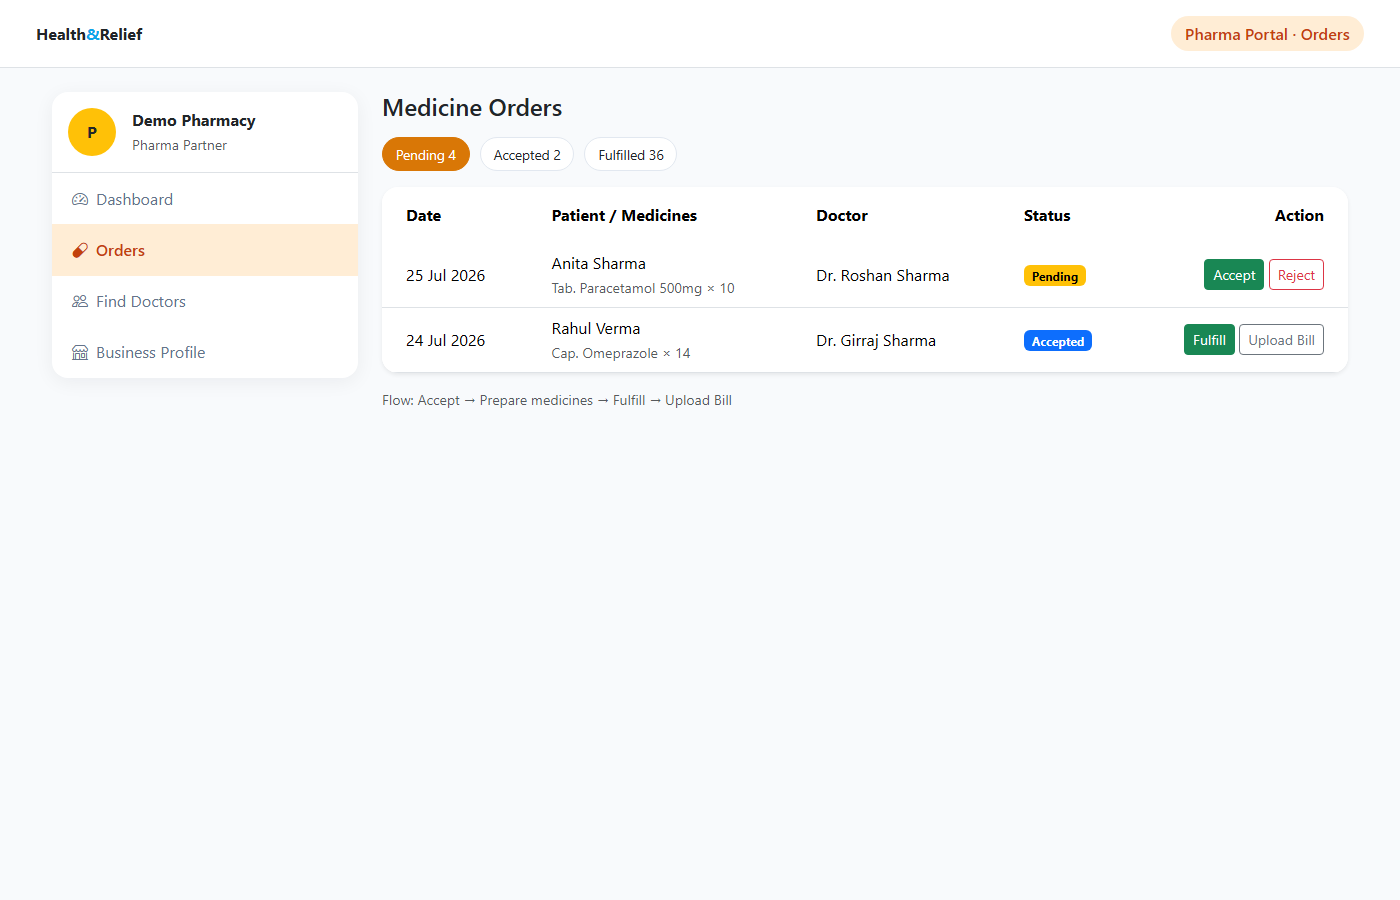
Official flow: Accept → Prepare → Fulfill → Upload Bill.
Extra reference screens
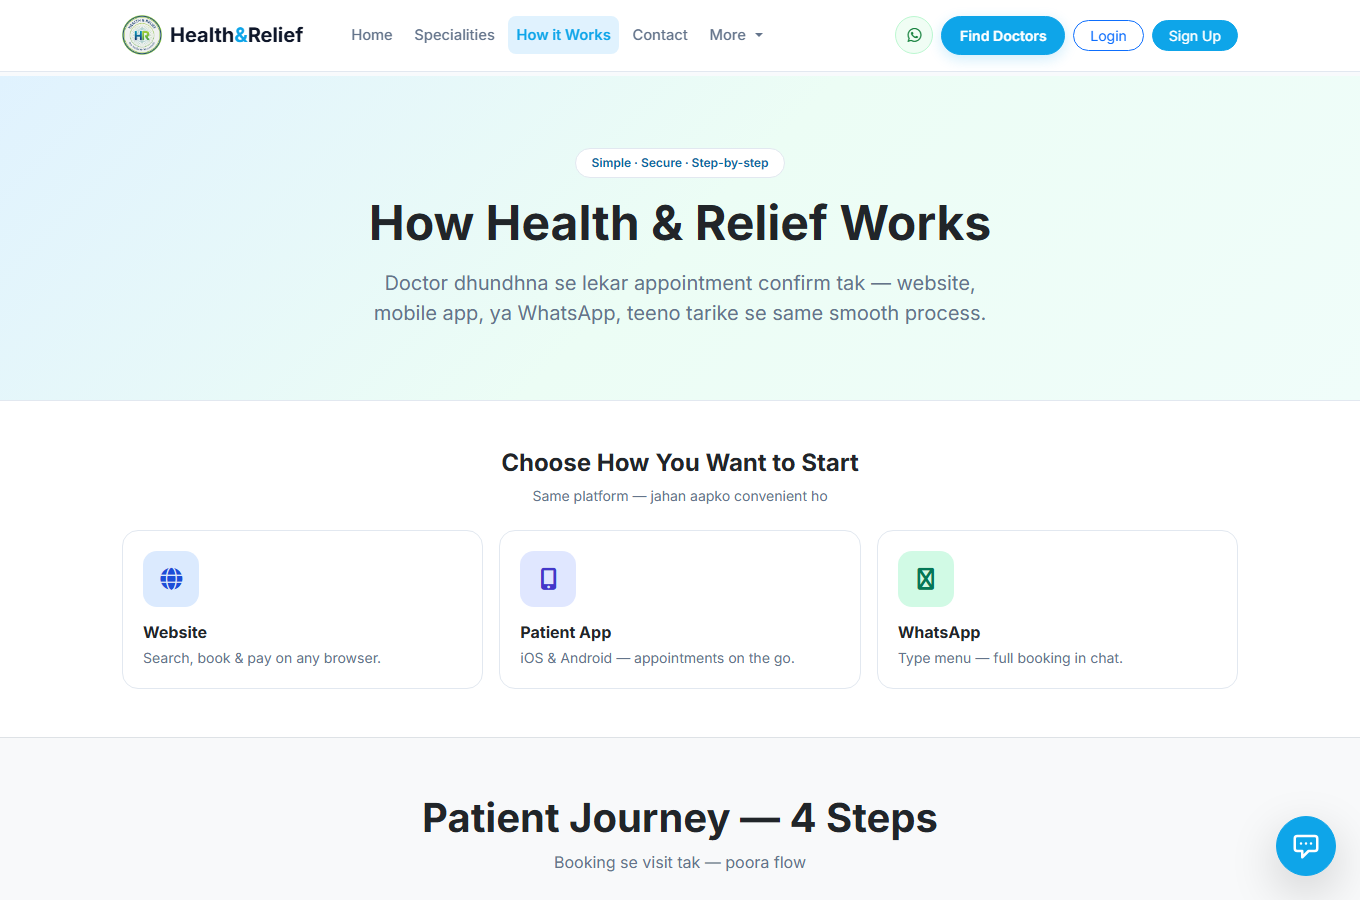
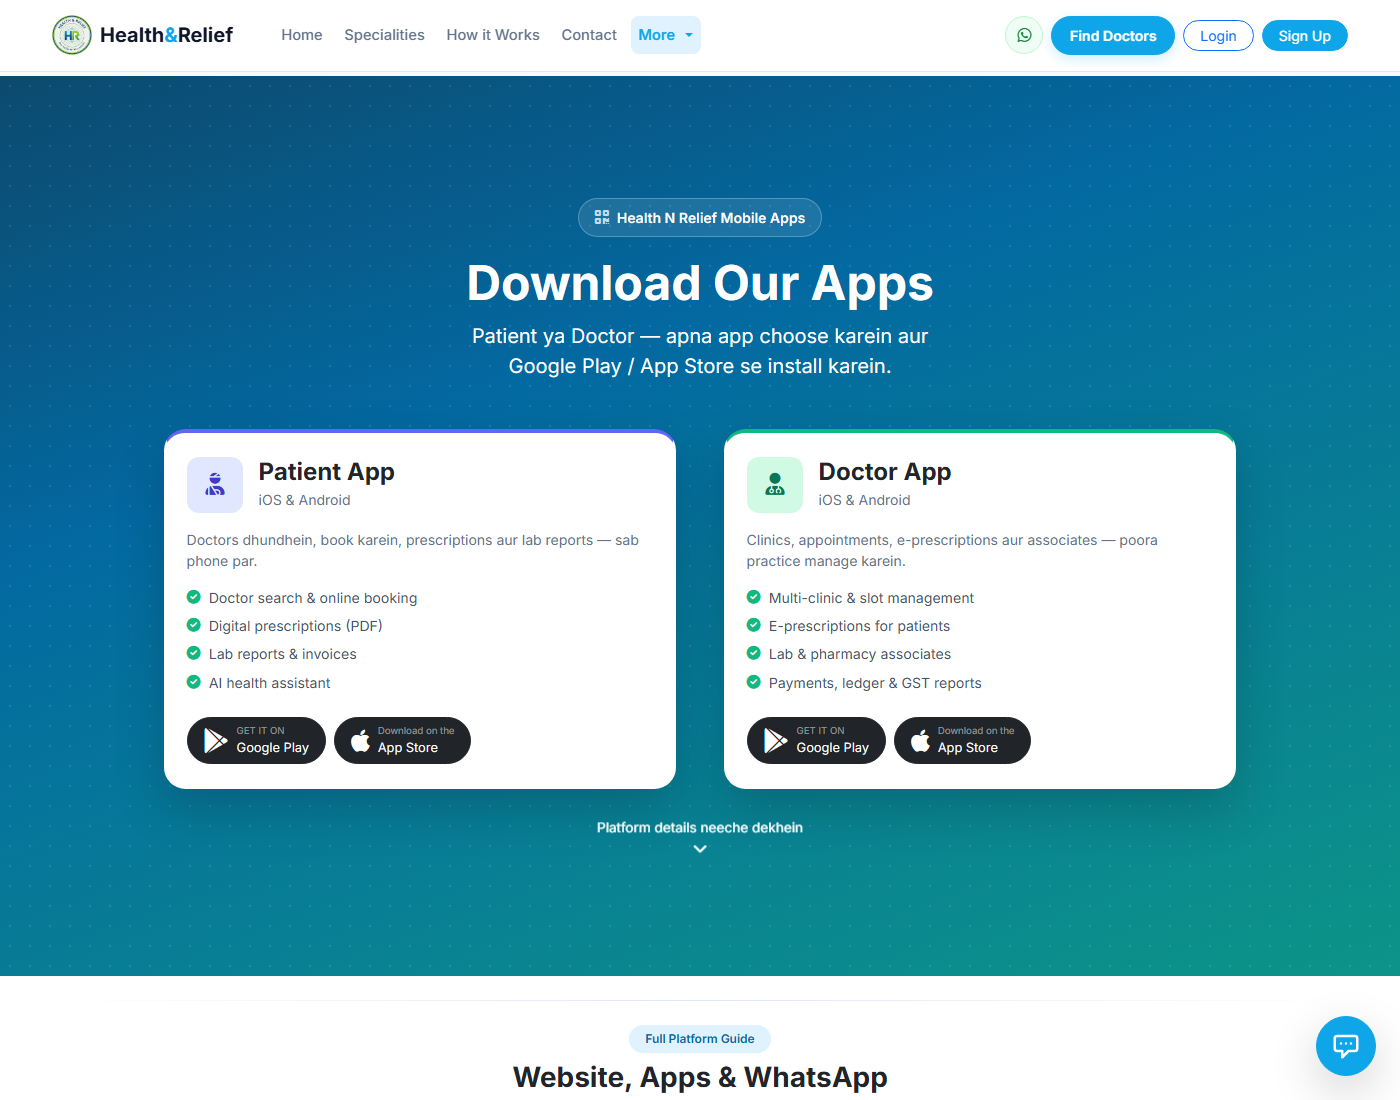
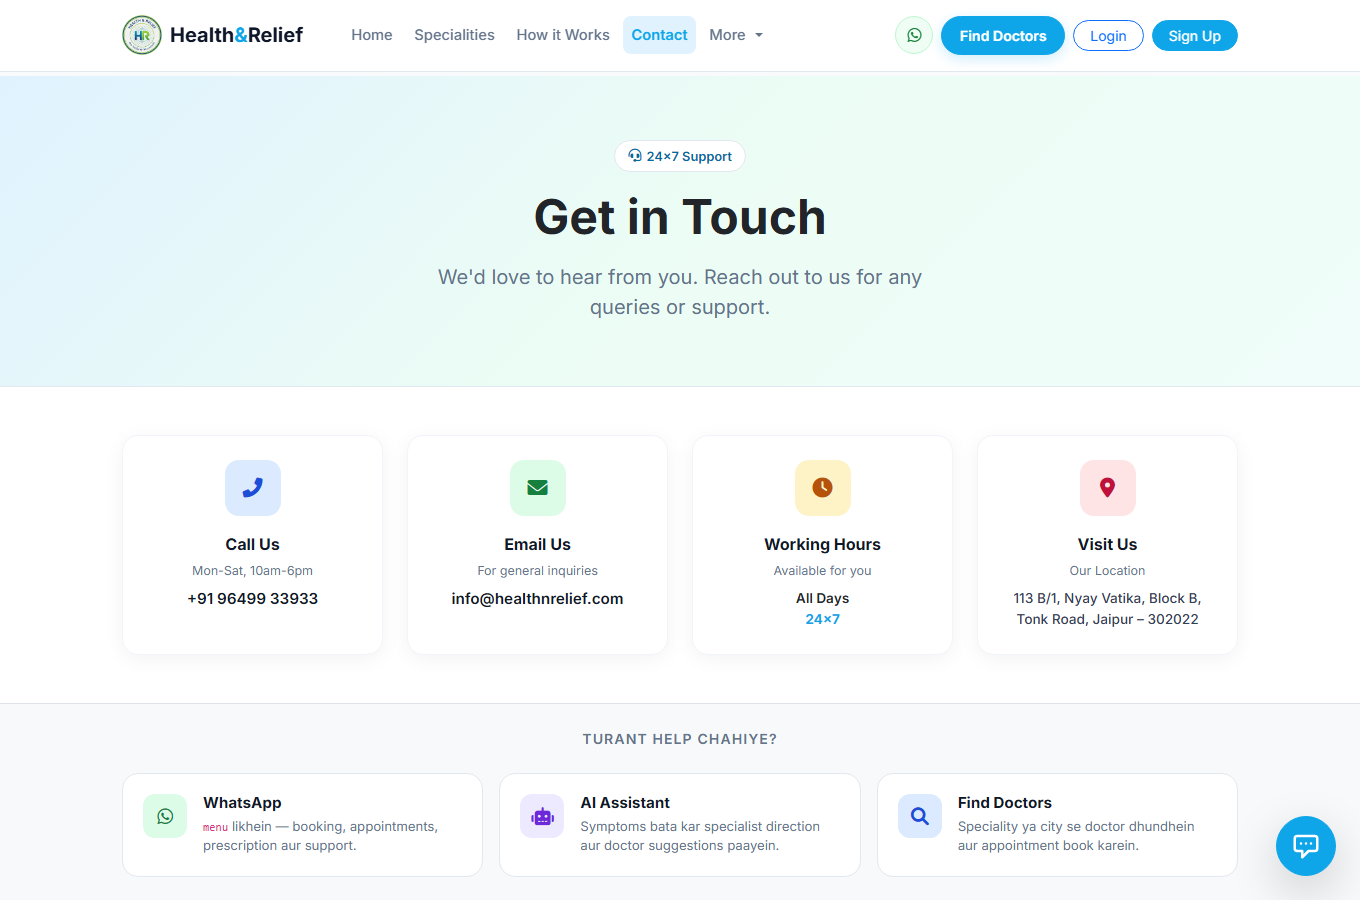
AI Health Assistant

Doctor book karein — 2 minute
Health & Relief
Naam aur mobile number chhod dein. Hum WhatsApp par callback / booking help kar denge — village se ho ya sheher se.